Forums
The following is a complete list of emotes used on the forum but not directly visible in the post editor. To use the emote simply type the code into your post.
NOTE: Some of the codes for the forum emotes differ from those used in the private message system, but as those can be selected visually this shouldn't pose a problem.
|
8) |
:wink: |
:excited: |
:cry: |
:-) |
:dead: |
|
:giveup: |
:razz: |
:mad: |
:wave: |
:eek: |
:dont: |
|
:sick: |
:huh: |
:oops: |
:laugh: |
:fly: |
:giggle: |
|
:mrgreen: |
:question: |
:!: |
:arrow: |
:idea: |
:shakefist: |
|
:rock: |
:nope: |
:grr: |
:omg: |
:kiss2: |
:shrug: |
|
:heart: |
:paranoid: |
:dunno: |
:facepalm: |
:pirate: |
:shy: |
|
=D |
:aha: |
:rain: |
:stare: |
:bomb: |
:zzz: |
|
:argh: |
:brb: |
:confident: |
:dumb: |
:cool: |
:sleepy: |
|
:rage: |
:hmm: |
:thumbup: |
:XD: |
:XP: |
:eh: |
|
:eyeroll: |
:zombie: |
:yoda: |
:snowman: |
:Peek: |
:Splode: |


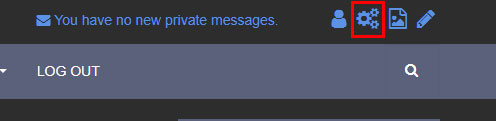
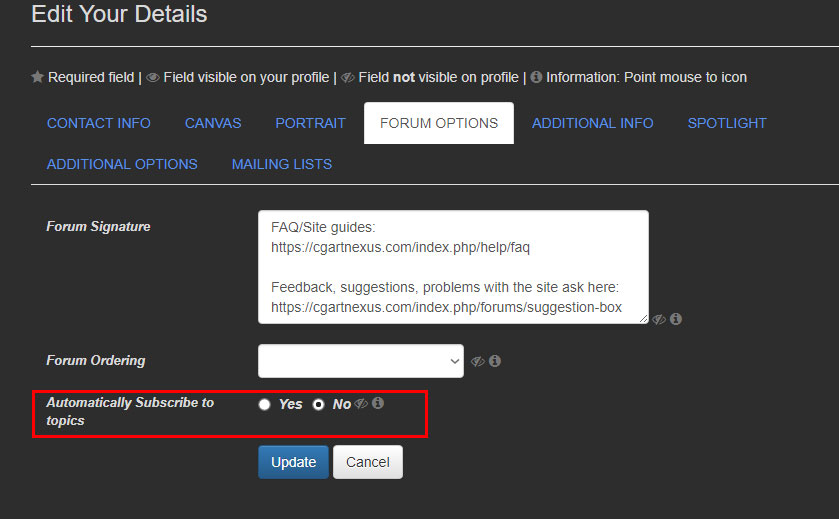
Open you profile settings (click edit profile in the user panel at the top of the site, or navigate to your profile and select update profile from the edit menu), and navigate to the "Forum Options" tab.
To post a link you can just post the full URL of the webpage you wish to link to (ensure you leave a space before and after the URL to separate it from any other text). The forum will automatically turn the url into a link.
You can also use standard BBCode (not HTML which is not used on the forum) to create a link from some text if you don't wish to use the full URL (bear in mind the character limit for your signature will be eaten up with your additional code and reduce the number of links possilbe).
By default the forum will check the subscription box for any discussions you reply to. You can change this behaviour in your profile settings. Click the edit profile button ot the top of the site
Now in your profile settings navigate to the "Forum Options" tab, then select no from the subscription option. Save your settings and you should now be able to post without having to un-check the sub option each time.
You have several options, by far the simplest method is to just type or paste the URL straight into your post and the forum will automatically turn it into a clickable link (NOTE: you must ensure that you leave a space before and after the URL in order for the forum to recognise it and link it correctly).
Alternatively you can click the link icon highlighted in the image below.

A section will open below allowing you to enter the URL and the text that you want to appear as a link. Then click the insert button and it will be added to your post.
Finally you can manually create your link using bbcode tags e.g.
[url=http://mylinkurl.com]My text that I want to show as a link[/url]
Inserting a video form sites like Youtube of Vimeo into your post couldn't be simpler. Just paste the URL of the page the video is on into your post and the video will automatically be embedded.
You can also embed video into your posts using the little filmstrip icon in the post editor and inserting the URL of the video.
HAL is the resident anti-spam bot bot who patrols the corridors of the forum smiting spam and the occasional genuine post attempt. HAL is cruel, merciless, and has an evil sense of humour it seems.
HAL can occasionally remove genuine posts he considers spam if, for example, you post too frequently (try to leave a minute or two between posts), or if you add too many URL links in your posts.
Generally he is OK but if your post is removed by HAL (a message should appear on screen telling you so) it can be re-instated by a moderator, just let us know.
No. This is purely for basic spam prevention. You are only required to complete the captcha for your first 5 posts on the forum, after that you may post freely.
At the bottom of the post editor you will see an attachments field (see image below)
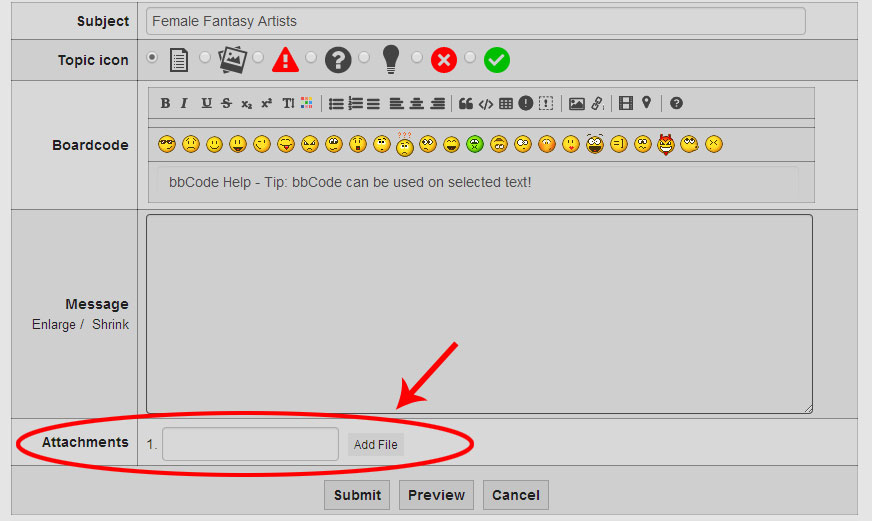
clicking the add file button will open a dialog to select the file you wish to upload. You can attach a range of different files types, for image attachments jpg (either .jpg or .jpeg file extensions are acceptable), png, and gif. You can also upload txt, rtf, pdf, zip, tar, gx, tgz, tar, and bz2 file formats. all attahed files must be below 512kb, and for images a maximum height and width of 1024 pixels (NOTE: Images with larger dimesnions can be uploaded but will be re-scaled to this limit). You may attach up to 8 images per post.
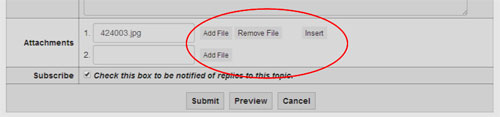
Once you have selected a file, it's name will apear in the attachement field and a new empty attachment field will appear up to a total of 8 file uploads per post. You can choose to remove an attachment by clicking the remove button next to the correct field. By default attached files are visible as an icon at the bottom of your post, if you wish your image attachment to appear within the content of your post click the insert button and the image will be positioned where the cursor is (it's a good idea to press return and place it on a separate line.
A final note, image attachments inserted into your post will not be visible in the post preview. Until you submit your post the image will just be represented in the post edit view as attachments tags and filename e.g.
[attachment:1]424003.jpg[/attachment]
Alternatively, you can host your images on another site, and link them using BBCode image tags e.g.
[img]http://www.urlofyourimage.jpg[/img]
Gallery
You can upload images via your gallery "user panel", you will find a link to this in the gallery itself (in the top left of the page), or in your profile under the images display area. Clicking this link opens your user panel allowing you to upload and manage your image files into categories.
In the User Panel you will see two buttons (Upload and Categories), and a search function to search through your images (not to be confused with the main gallery search).
Clicking the categories button will show a list or your avaliable categories. Here you can create new categories, edit, or delete categories.
Clicking the Upload button opens a page to select files for upload. Here you select the images you want to upload, select a category to place them in from the list or your own categories (you begin with just the main one with your username as it's title, unless you created more in the categories page), add a title for the images and whether you want them published or not (in other words, whether your want them to be visible in the gallery or not, usually yes). You can also add a descrition of the image which will appear below it in the gallery. NOTE: currently the gallery has no tags system, but descriptions are read by the gallery search engine, so if you wish to make your image easier to find, it is recommended to add a brief description and maybe some key words.
If you believe your work is being used by someone else in the gallery you can use the report image button (displayed below the image by the social sharing buttons), and fill in the details in the window that pops up. A site Admin will then look into removing the image.
Alternatively, you can contact us directly via email (use the Contact Us form), or you can send a private message to any of the administrators here via their profile (you need to be registered and signed in for this).
We take Copyright theft seriously and it against the terms of use of the site to post and claim/imply ownership of artwork that is not your own.
Blogs
Yes. Each user basically has access to their own folder to upload images and files to for placing in blog articles. When you click on the "insert/edit image" button in the text editor a media manager will open. From here you can upload, replace and delete files from this folder without affecting other users files (remember that if you delete a file it will obviously no longer be available for any already published articles that used it).
NOTE: this user folder should only be used for storing files for use in published articles and not as a general storage space.
The process to upload and insert an image is as follows:
- Click the insert image button in the test editor:

- The media manager window will open and allow you to upload, manage and selct images.
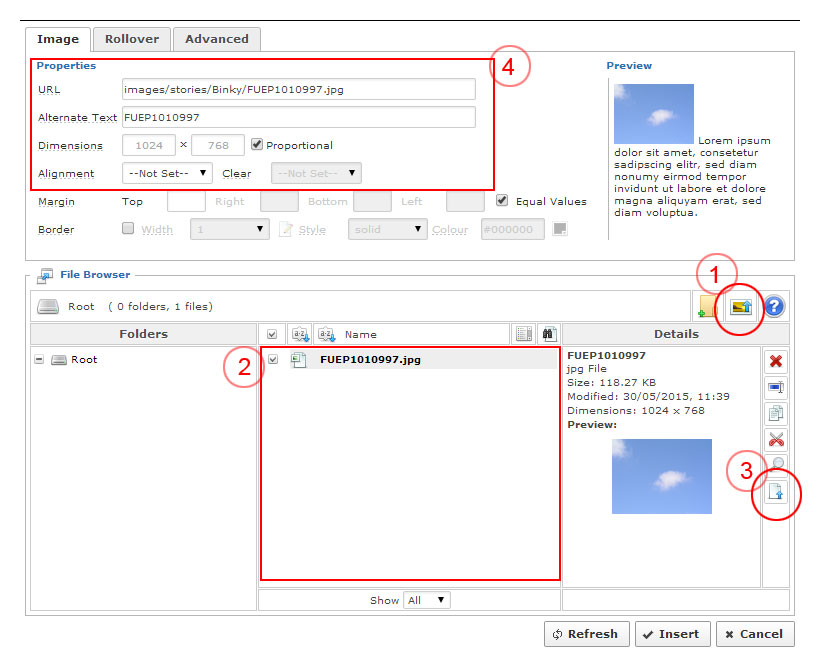
- In the manger, click the upload button (number 1 in the above screenshot), and an upload window will open. In the upload window you can drag and drop one or more files for upload or use the browse button to navigate to your chosen files (each file must be below 2mb in size, it is recommended you optomize your images for web display before uploading). Clicking the upload button will close the upload window and return you to the file manager.
- You should now see the files listed in the file brower (number 2 in the screenshot), and can select from the list the image you wish to insert. Clicking a file should automatically insert the image information in the properties fields (marked 4 in the screenshot), but if this doesn't happen just click the insert button (number 3) and it will update.
- You can edit the properties to clter the display size and alignment of the image etc. Once done, click the main insert button at the bottom of the window and your image will be inserted into the document where the cursor was positioned.
Embedding videos from sites like YouTube or Vimeo into articles works slightly differently to how it is done on the forum.
In order to place the video into your article add the following into your article where you want the video to appear:
{videobox}myvideoURL{/videobox}
(where myvideoURL is the URL of the video you wish to embed).
The site supports embedding of video and live streams from Youtube, Vimeo, Twitch etc.
Visit your profile page and open the Blogs tab on the menu bar. You should see a big green button named "New Blog". Clicking that button will open the blog editor for you to get writing and publish your article. The rest of the options should be fairly straight forward.
You must provide a title for the article and select a category from the list. You can choose to make the article public (recommended), or only visible to registered (i.e. logged in) members. Then write a brief introduction to lead into the article (this is what people will see first on the home page and blog pages of the site. Then follow that up with the main article content.
Once finished, click the create blog button and your article will be published and will appear in the list of articles in the tab you opened at the start.
Profiles and User Accounts
Because of the way profiles are generated internally by the site the URL that appears in your browser is fairly generic. Because of this we have added a shareable physical link in the contact info tab on your profile to make things a bit more convenient for you. If you don't want this link to appear directly on your profile page itself, you can choose to make it private (you will still be able to find the link in your settings whenever your need it).
Well, crazy person, you can delete your account here by navigating to your profile settings (click the profile link at the top right of the site, or visit your profile and use the update your profile option in the edit menu).
Once in the profile settings find the additional options and check the delete my account option, then hit the update button to save the settings. You should be asked to confirm this action give you a chance to change your crazy mind. Once confirmed you will no longer be logged in and your account here will cease to be and all profile information will be deleted.
Another option would be to disable your account using the option found in the same options tab. This will hide your profile placing it in profile limbo but will keep all of your information.
These components are similar to the kind of interactive comment systems found on popular social networks. They allow you and/or others to post comments and share information (videos, images, links, use Twitter style hashtags, etc.) directly on your profile.
Each of these functions can be enabled to show on your profile, or disabled if you don't want them to appear. This is done through the "additional options" tab in your profile settings (click edit profile in the panel in the top right of the site near your avatar, or visit your profile and select the update profile from the edit menu).
These different modules are similar in function, but the differences are as follows.
The Wall - This is a general purpose option that allows any registered member of the site to post on your profile.
Profile Book - This is basically a guestbook allowing other members of the site to post comments on your profile. Unlike the Wall, you cannot post on the Profile Book yourself (you can remove unwanted posts from it if necessary as you can with the other functions).
Profile Blog - This should not be confused with the main community blogging system found in the main menu of the site and under the "blogs" tab on your profile. The Profile Blog is a basic blog restricted to your profile and, unlike the community blog, articles are not displayed anywhere else. It is intended for posting brief comments on your profile. Other members cannot post on your Profile Blog.
Activity - The activity tab is similar to the status function found on Facebook, or Google Plus posts. It allows you to post brief comments about what you may be up to, share links etc. Others users can then post comments on your Activity posts.
It is probably unlikely that you would want or need all of these active on your profile at the same time, but you can enable or disable these options as you want.
Connecting your account with one of the social network sites will allow you to log in using your log in details (username and password) from one of those sites, and if you are already logged into one of them, clicking the associated log in button here will automatically sign you in with a single click without the need to enter your username and password at all. Speedy huh?
You can connect your account quite simply by accessing your profile edit page (click the link in the header top right, or visit your profile and select "update your profile" from the edit drop down menu. Once you have your profile settings open you'll see the social link buttons on the left. Clicking any of them will briefly send you to that site to enter your username and password for that site and may ask you to confirm that you want to allow access. Once you have done that you will be returned here and the process is complete.
Once you have linked one or more of the social site to your account you can choose to use the social log in or continue to use the regular CG Art Nexus log in details. You can unlink your account at any time by again visiting your profile settings. There you will find an option to unlink your account under the "contact info" tab.
Profiles have a few small customization features, but don't go expecting too much.
Canvas image.
You can change the canvas image (the background image displayed in your profiles header), by editing your profile and opening the "Canvas" tab. Here you can choose from one of the preset images, or upload your own. Canvas image files should be a maximum of 1280x640 pixels and under 1048kb (approx 1mb) (the default images are 700x200 pixels to give you a rough guide).
Template.
Below the canvas selection in the Canvas tab, you will also find the option to change the template (theme) of your profile. Currently there are only a handful of options but more will become available at some point. If you have any suggestions/requirements let us know via the suggestions and feedback section on the forum.
Profile details and components.
You can also use the privacy options to control which information is displayed on your profile, making certain details private (i.e. hidden completely), or visible only to certain people in your connections list. There are also options to enable or disable certain functions such as the Wall or Activity for example. It is best to check out the available options in the profile settings. Also note that empty tabs and fields are not displayed, so some tabs and modules can be hidden simply by not entering any information into them in the first place.
If you have any further questions not answered here, you can ask via the forum, send a private message to one of the site admins, or use the form below to email us.